Turn Stale Bread into Gourmet Crunch: Perfect Homemade Croutons
There's a quiet magic in the kitchen, a satisfaction that comes from transforming humble ingredients into something truly special. Few culinary feats embody this more perfectly than crafting your own homemade croutons. What starts as a forgotten loaf, perhaps a day or two past its prime, can be resurrected into golden, crunchy jewels that elevate everything from a simple green salad to a hearty winter soup. Forget the often-stale, preservative-laden store-bought variety; once you experience the fresh, customizable crunch of homemade, there's simply no going back. This comprehensive guide will walk you through the essential steps, tips, and tricks to perfect your very own homemade croutons recipe, turning that stale bread into a gourmet delight.
Why Homemade Croutons Are a Game-Changer (and So Easy!)
At their core, croutons are just crispy, toasted cubes of bread, yet their impact on a dish is immense. The beauty of a homemade croutons recipe lies in its simplicity and the sheer superiority of the final product. Here’s why making them yourself is a culinary win:
- Unbeatable Freshness: Unlike store-bought options that can taste dusty or overly processed, homemade croutons burst with fresh flavor, herbs, and spices.
- Ultimate Customization: You control every ingredient – from the type of bread and fat to the precise blend of seasonings. Craving garlic and Parmesan? Or perhaps a hint of smoked paprika? The choice is yours.
- Reduce Food Waste: This is arguably one of the most rewarding aspects. Stale bread, often destined for the bin, finds a delicious new purpose, saving you money and contributing to a more sustainable kitchen.
- No Mystery Ingredients: You know exactly what goes into your croutons, avoiding artificial flavors, colors, or excessive sodium often found in commercial products.
- Therapeutic Process: There’s a calming rhythm to cubing bread, tossing it with oil and spices, and watching it transform in the oven. It’s a small, satisfying act of culinary alchemy.
Many home cooks might shy away, thinking it's too much effort, but the reality is that a truly great homemade crouton recipe requires minimal skill and time, yielding maximum flavor payoff.
The Foundation: Choosing Your Bread Wisely (or Resourcefully)
The journey to perfect croutons begins with your choice of bread. While almost any bread can be transformed, some varieties truly shine, lending themselves to an exceptional texture and flavor profile.
Bread Type: The Canvas for Your Crunch
For the quintessential crouton experience, opt for a crusty, artisanal loaf. Think along the lines of:
- Sourdough Boule: Its tangy flavor and open, airy crumb create fantastic pockets for seasonings to cling to, resulting in wonderfully irregular, rustic shapes.
- French Baguette: Known for its crisp crust and chewy interior, a baguette yields delightfully petite and elegant croutons.
- Ciabatta or Artisan Loaves: These often have a robust structure and an irregular crumb, perfect for absorbing flavor and achieving a satisfying chew.
The key here is bread with some structure. The more open the crumb (the holes in the bread), the more nooks and crannies there are for your chosen fats and seasonings to nestle into, ensuring every bite is bursting with flavor. That said, don't let a lack of artisanal bread stop you! Standard sandwich bread, challah, or even gluten-free bread can also make delicious croutons. The essence is merely toasting and flavoring bread cubes, so feel free to experiment with whatever you have on hand.
Stale vs. Fresh: The Dehydration Advantage
This is where that "stale bread" notion comes into its own. Older, slightly dehydrated bread is actually preferable for croutons. Why?
- It's already lost some moisture, meaning it will toast and crisp up faster in the oven.
- Fresh, very soft bread can sometimes become a little gummy or take longer to achieve that coveted crunch.
If all you have is fresh bread, don't despair! You can "stale" it slightly by tearing or cubing it and letting it air-dry on a baking sheet for an hour or two, or even in a very low oven (around 200°F / 95°C) for 10-15 minutes until it feels firm to the touch.
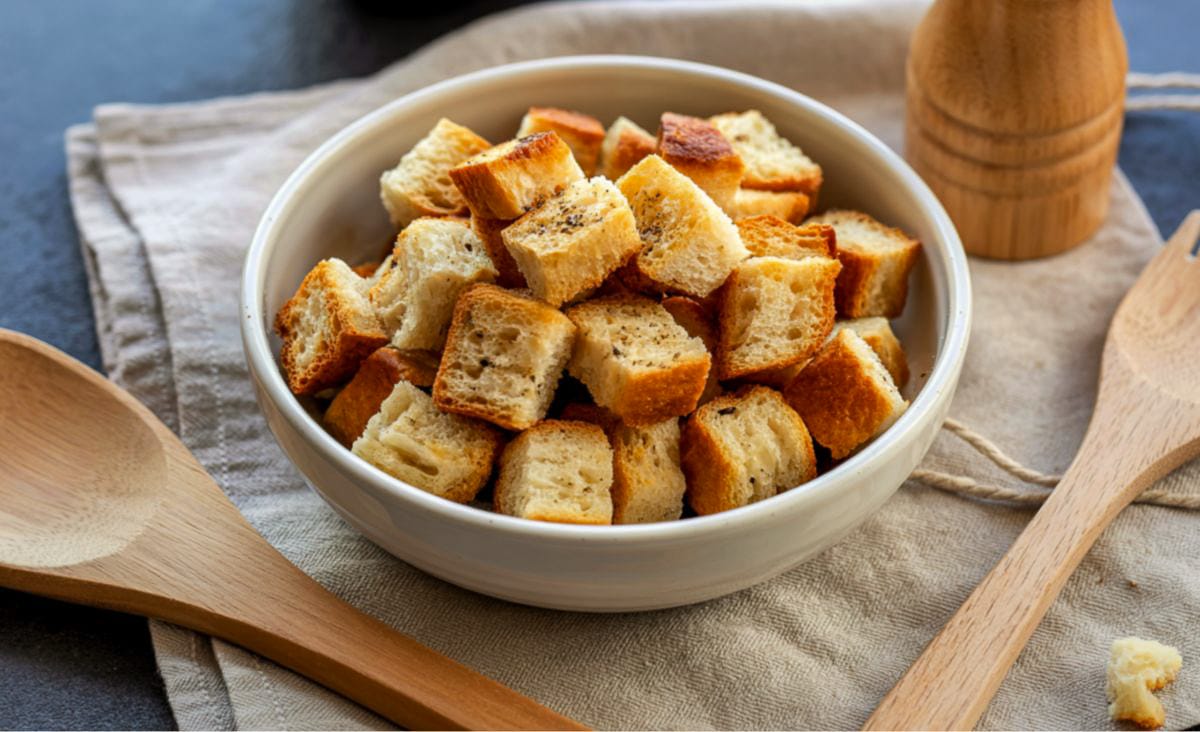
Size and Shape: Mastering the Bite
While uniformity can be appealing, don't obsess over perfectly identical cubes. Whimsically irregular shapes add character and a delightful rustic charm. However, do consider the size:
- Smaller Cubes: Will toast faster and result in an all-over crispness. Ideal for delicate salads.
- Larger Cubes: May have a crisp exterior with a slightly chewier interior, offering a more substantial bite. Perfect for heartier soups or as a snack.
Generally, aiming for cubes around 1/2 to 3/4 inch (1.25 to 2 cm) is a good starting point for most applications.
Mastering the Flavor: Fat, Seasoning, and Beyond
Once you've selected and cubed your bread, the real magic of your homemade croutons recipe begins with infusing them with flavor. This involves a careful balance of fat and seasoning.
The Fat Factor: The Crisping and Flavor Catalyst
Fat is essential for crisping and carrying flavor. The best approach, in our opinion, is a blend of olive oil and melted butter.
- Olive Oil: Provides a rich, savory base and helps achieve a beautiful golden crust. Its higher smoke point is also beneficial for baking.
- Melted Butter: Imparts an incomparable richness, depth of flavor, and contributes to that desirable golden-brown hue.
The golden rule for flavorful croutons is approximately one tablespoon of fat (combined oil and butter) per slightly heaping cup of cubed bread. This ratio ensures every piece is adequately coated without being greasy, allowing for even browning and crispness. You can certainly use only olive oil for a dairy-free option, or only butter for an incredibly rich result, but the blend truly offers the best of both worlds. For an even more luxurious taste, consider using clarified butter (ghee) which adds a nutty depth.
Seasoning Essentials: Your Personal Flavor Palette
This is where you can unleash your creativity. While the possibilities are endless, a few staples are non-negotiable for a truly delicious homemade croutons recipe.
- Kosher Salt: The only truly indispensable seasoning. Salt doesn't just make things taste salty; it enhances all other flavors, bringing them to life. Use generously but wisely, tasting as you go.
- Freshly Ground Black Pepper: A classic companion to salt, adding a subtle warmth and bite.
- Garlic Powder & Onion Powder: These dried, granulated forms distribute evenly and provide foundational savory notes without the risk of burning that fresh garlic might.
- Dried Herbs: Rosemary, thyme, oregano, basil, or a classic Italian blend are fantastic choices. They cling well to the oiled bread and release their aromas as they bake. For an extra aromatic kick, finely chop fresh herbs like parsley or chives and toss them with the croutons *after* they've baked and cooled slightly.
- Smoked Paprika or Cayenne Pepper: For a touch of warmth or a spicy kick, respectively.
- Ranch Seasoning: For a fun, "junk-food" inspired flavor that's surprisingly addictive.
- Curry Powder: For an aromatic, savory, and exotic twist.
- Hard, Aged Cheese (e.g., Parmesan, Pecorino Romano): If you're adding cheese, choose a hard variety with very low moisture content. This ensures it crisps up beautifully rather than melting into a soggy mess. Grate it finely for best results.
Pro Tip: Don't be shy with your seasonings. The croutons are essentially small flavor vehicles, and you want each bite to be impactful. A good starting point might be a teaspoon of garlic powder, 1/2 teaspoon of onion powder, and 1/2 teaspoon of dried herbs per 4-5 cups of bread cubes, in addition to salt and pepper. Adjust to your palate!
The Simple Steps to Crunchy Perfection (Your Homemade Croutons Recipe)
Ready to bring it all together? Here’s a straightforward homemade croutons recipe that guarantees success every time.
- Preheat & Prep: Preheat your oven to 375°F (190°C). Line a large baking sheet with parchment paper for easy cleanup.
- Cube Your Bread: Using a serrated knife, cut your chosen bread into roughly 1/2 to 3/4-inch cubes. Aim for similar sizes for even baking, but don't stress about perfection.
- Combine Fat: In a large bowl, whisk together your olive oil and melted butter.
- Toss with Bread: Add the bread cubes to the bowl with the fat. Toss thoroughly, using your hands or a spatula, until all the bread pieces are evenly coated. Don't be afraid to get in there with your hands to ensure good distribution.
- Season Generously: Sprinkle your chosen seasonings (kosher salt, black pepper, garlic powder, herbs, etc.) over the bread cubes. Toss again to ensure the spices adhere evenly to all surfaces. If using Parmesan, add it now.
- Spread & Bake: Spread the seasoned bread cubes in a single layer on your prepared baking sheet. Avoid overcrowding, as this can steam the croutons rather than crisp them. If necessary, use two baking sheets.
- Bake to Golden Perfection: Bake for 10-20 minutes, depending on the size of your cubes and the freshness of your bread. Halfway through the baking time (around 8-10 minutes), toss the croutons to ensure even browning. Continue baking until they are deeply golden brown and feel firm and crisp to the touch. Keep a close eye on them towards the end, as they can go from perfectly golden to burnt quickly.
- Cool Completely: Remove from the oven and let the croutons cool completely on the baking sheet before storing. They will crisp up further as they cool.
Storage, Shelf-Life, and Endless Culinary Adventures
Once your irresistible homemade croutons are cooled, proper storage is key to maintaining their crunch and extending their life.
Storage and Shelf-Life
The enemy of a crispy crouton is moisture. To ensure your homemade delights stay fresh and crunchy:
- Cool Completely: This is perhaps the most crucial step. Store only once the croutons are absolutely, completely cool to room temperature. Any lingering warmth will create condensation in the container, leading to sogginess and potential mold.
- Airtight Container: Transfer the cooled croutons to an airtight container or a resealable bag.
- Dry Place: Store them in a cool, dry place, away from direct sunlight or humidity. The pantry is ideal.
When stored correctly, homemade croutons can last for up to two weeks. If they start to lose a bit of their crispness, a quick refresh in a hot oven (around 300°F/150°C) for 5-7 minutes can often bring them back to life.
Gluten-Free Friendly
Absolutely! The beauty of this homemade croutons recipe is its adaptability. Simply follow the exact same process, substituting your favorite gluten-free bread for conventional bread. The results will be just as delicious and satisfying.
Beyond the Bowl: Creative Uses for Your Croutons
While the classic Caesar salad is an undeniable stage for homemade croutons, their utility extends far beyond. These crunchy bites are incredibly versatile and can elevate countless dishes. Here are just a few ideas:
- Soups: A handful of garlicky, herby croutons transforms a bowl of tomato soup, lentil soup, or a creamy bisque into a meal. They add texture and flavor that contrasts beautifully with the smoothness of the soup.
- Panzanella: This Italian bread salad is essentially a celebration of croutons, soaking up the vibrant flavors of fresh tomatoes, basil, and vinaigrette.
- Snacks: Honestly, a fresh batch of perfectly seasoned homemade croutons is a delicious snack on its own. You might find yourself reaching for them straight off the cooling rack!
- Topping for Roasted Vegetables or Casseroles: Sprinkle crushed or whole croutons over roasted broccoli, green bean casserole, or baked mac and cheese for an extra layer of crunch and flavor.
- Breadcrumbs: Whiz cooled croutons in a food processor to make instant, flavorful breadcrumbs for coating chicken, fish, or topping gratins.
For more innovative ways to use your culinary creations, check out our guide on Beyond the Salad: Creative Uses & Flavor Hacks for Homemade Croutons. And to truly explore the depth of customization, our article Master the Best Homemade Croutons: Easy, Crunchy & Customizable offers even more inspiration for flavor variations.
Conclusion
Making homemade croutons is more than just a recipe; it's a testament to the power of simple ingredients and a mindful approach to cooking. It's about rescuing forgotten bread, reducing waste, and infusing your meals with unparalleled freshness and flavor. This easy homemade croutons recipe proves that some of the best culinary pleasures are the most straightforward. So, next time you find a loaf nearing its end, don't discard it. Embrace the opportunity to create golden, crunchy magic that will transform your salads, soups, and snacks into gourmet experiences. Your taste buds (and your budget) will thank you.
